Showing posts with label recipe. Show all posts

Thursday, November 28, 2013

Beef Shank Casserole

This is a super scrumptious hot comforting AND inexpensive dinner that can be made in 15 minutes! 

  • 2 cups left-over beef stew (I did this the night before: 1 shank, braised in enough tomato sauce to cover the meat. Seasoned with thyme, garlic and chilli flakes (or any hot sauce you want). Simmered with a lid on for 3 hours before I removed the meat, reduced the sauce, pulled the meat then reunited the sauce. Tip: All stew is better the next day.) 
  • 1 cup orecchiette or spirali 32 (shown)
  • 1 cup frozen peas
  • 1/2 cup aged cheddar, grated
  • a little butter

  1. While you are waiting for your (salted) pasta water to boil, gather your other ingredients - not that there are many. 
  2. Sip some whiskey. If you’re making such a from-the-pantry dish, you may be tired, broke or just in need for some comfort, fast. You can also grate your cheese now. (Man I hope you don’t buy that pre-grated crap.) 
  3. Butter your personal-sized casserole dish. I got mine at Winners. It may be a 2 person serving, but YOLO and I like to eat....a lot. The butter will help the pasta get a little crunchy on the edges, if you’re into that kind of thing. 
  4. Test out your pasta. You want it under done but not crunchy. Drain and save a little water (always, with every pasta dish) in the pot and return it to the stove. 

  5. Add the saucy braised shank and once it’s hot, throw in the peas, hot sauce and pasta. Give it a quick stir, taste and season then pour it into the casserole dish and top with cheese. 
  6. Broil while watching through the oven window, face almost pressed agains it until your bubbly cheese starts getting crusty. Pull it out when you like how it looks. 
  7. Good job, you deserve more whisky. Once you’re done eating, you should probably have some well-earned gelato too. 


Saturday, June 22, 2013

Sausage Kale Bread Bake


When I cook I find myself imagining two realities ( neither the present). I start by making a supper. It is nutritious, fun and delicious and even as I cook on a whim I feel confident of my decisions and I explain what I am doing and why to my audience (I’m cutting the crust off of this fresh loaf of bread, and this is how I hold my hand so I can keep it still and guide the knife at the same time, and we are taking off the crust not because it isn’t good but because the crust will block the soft porous interior - soon to be in large dice -  from absorbing the seasoned egg mixture.)  But soon my vision slips into the second reality and I am teaching not on a television show but to my children, who I can’t imagine, but in my dream I know are there. 

So as I often express, apologies for the verbosity but I promise you will learn and be rewarded with a delicious, cheap and quick dinner that's a cinch to prepare, even when there isn't much in the fridge. The opportunities for substitutions are vast so use what you like, but keep it simple and use fresh, local whole foods.
To work efficiently you need to have everything ready, so turn on the oven to 350 ℉ and gather your ingredients:
  • 1/2 bunch of kale, washed, boiled in seasoned water then blanched 
  • 1 onion, any kind you want, cut in half then sliced thinly
  • 1 sausage.  I used the Deli Sausage at Sanagan’s Meat Locker but the flavour options are endless and you could even add some bacon because why not. Vegetarians: I would crumble seasoned tofu into the egg mixture rather than a veggie sausage as they often are not healthy at all.
  • 5 eggs, cracked into a bowl, whisked and then seasoned (if you season the egg first then whisking makes it rubbery).  I added some barbecue sauce to this wet mixture, as well as about a 1/4 cut of chicken stock but you could use anything with equal viscosity: tomato sauce, milk, beef stock, apple sauce thinned out with worcester, et cetera.
  • 1 loaf of crusty bread, crust removed and the interior diced
  • Sriracha, or any hot sauce you like
  1. Heat up a medium sized frying pan, add a splash of oil, then push the sausage out of the casing and into the pan. Add the onions and sauté together, with a little maple syrup if you have some. Add the bread and continue onto the next step as it warms up and marinates. 
  2. Line the bottom of a shallow baking dish with a thin layer of hot sauce. Using the back of a large spoon is best for spreading out the sauce. 
  3. Squeeze the kale of excess moisture so the eggs don’t curdle and chop it into one inch strips, then pack into a single layer above the hot sauce in the baking dish. 
  4. Taste the bread mixture and season accordingly. Pour it into the baking dish but do not pack it down (this is so that when we pour in the eggs, the mixture can dissipate into each layer, and down to the kale)
  5. Pour in the eggs, then push down the bread with the back of that large spoon of yours. As the spoon sinks into the bread, you will notice some of the egg mixture sinks onto the spoon; drag the soon backwards slowly and tilt it so that you can glaze the surface.
  6. Bake for 30 minutes at 350 ℉ and don’t burn your tongue when you try to scarf it down scalding hot.  :)  This recipe makes about 4 servings if it is served with a side salad 


It costs only about ( eggs: 5, 4/12 = 30cents/egg x 5 = ) $1.50 + (kale $2/bunch) $1 + (bread) $3 + (sausage) $2 + (onion, hot sauce, maple syrup, chicken stock) $1 = $7.50 / 4 =  Less than $2 per person! 

Why so healthy? 

  • it’s made from scratch, with love
  • it uses whole foods - only the hot sauce is packaged
  • the sausage is made locally, using locally sourced meat that is hormone and antibiotic free
  • the bread can be whole wheat or unbleached, which ups it’s nutrition
  • eggs are a great source of protein (6g/serving! ) 
  • kale is super high in antioxidants, vitamins, minerals and fibre 

Wednesday, May 29, 2013

Spring Potato Salad


Super easy and healthy:

Ingredients:
about 6 new potatoes, cut in half
about 2 cups of green beans, chopped in half
big handful of organic heirloom tomatoes (found at Lucky Moose in Chinatown)
1/4 cup fresh dill, chopped
2 cloves garlic, pureed

Dressing:
1 tbsp grainy mustard
1 tbsp mayo
1/4 cup sour cream
salt and pepper

1. Put the potatoes in cold water and bring to a simmer. Cook until tender, then add the green beans and cook 1 minute longer.
2. Drain and while still warm, add the tomatoes, dill, garlic and dressing.
3. Serve warm, or chilled. Beef it up with lettuce, or add some boiled eggs for added protein.


So, now you know it's easy to make, this is why it's good for you:

Garlic: promotes heart health, boosts the immune system, and helps circulation and is a natural antibiotic.
Dill: helps digestion by promotion of bile secretion, helps to calm menstrual cramps
Sour cream: yes, it is high in fat, but the body and brain needs fat from natural sources in order to function at full potential.
Heirloom tomatoes: I like to buy organic tomatoes because they are made up of so much water that toxicity can be high in tomato plants that are sprayed with pesticides. 'Heirloom' means these little guys have never been crossbred so the chance of them being GMO is also incredibly small.

Monday, January 2, 2012

Coleslaw

coleslaw.
Although I'm unemployed, it seems I am rarely home and it is depressing when I watch an entire case of baby spinach go to mush before it is opened. What I need is an appetizing, affordable and nutritional food in my fridge that will stay good  for a week. I need coleslaw. 
I almost always have coleslaw in my fridge. It is the perfect food for a number of reasons. Cabbage, carrots and onions are cheap and available all year round. They last forever in your fridge and so do the other ingredients necessary for slaw: mayonnaise and vinegar. Once you make your slaw, it will last up to a week. Red cabbage, carrots and onions are packed with nutrients. Of course, as soon as any vegetable is picked, plucked, cut, or cooked it begins to lose its nutritional value, but coleslaw is still better than KD. 
My recipe: 
1/2 red cabbage, shredded
2 carrots, grated
1 kholrabi, peeled ( optional. It is another healthy veg that stays fresh for a long time)
1-2tbsp apple cider vinegar
1 tbsp mayonainse
salt and pepper
Stir it all together and eat. The next day, stir again before eating and it will be even better than day one!

Thursday, September 8, 2011

Can't Wait for Those Peaches to Ripen?

Every Ontarian knows that it is peach season and we all have the sticky, smiley faces to prove it.

But living alone, one has got to be creative when finding a way to eat through a basket of peaches. They were just $2.77 at No Frills, but not one peach was ripe.

What to do!?

Friday, August 13, 2010

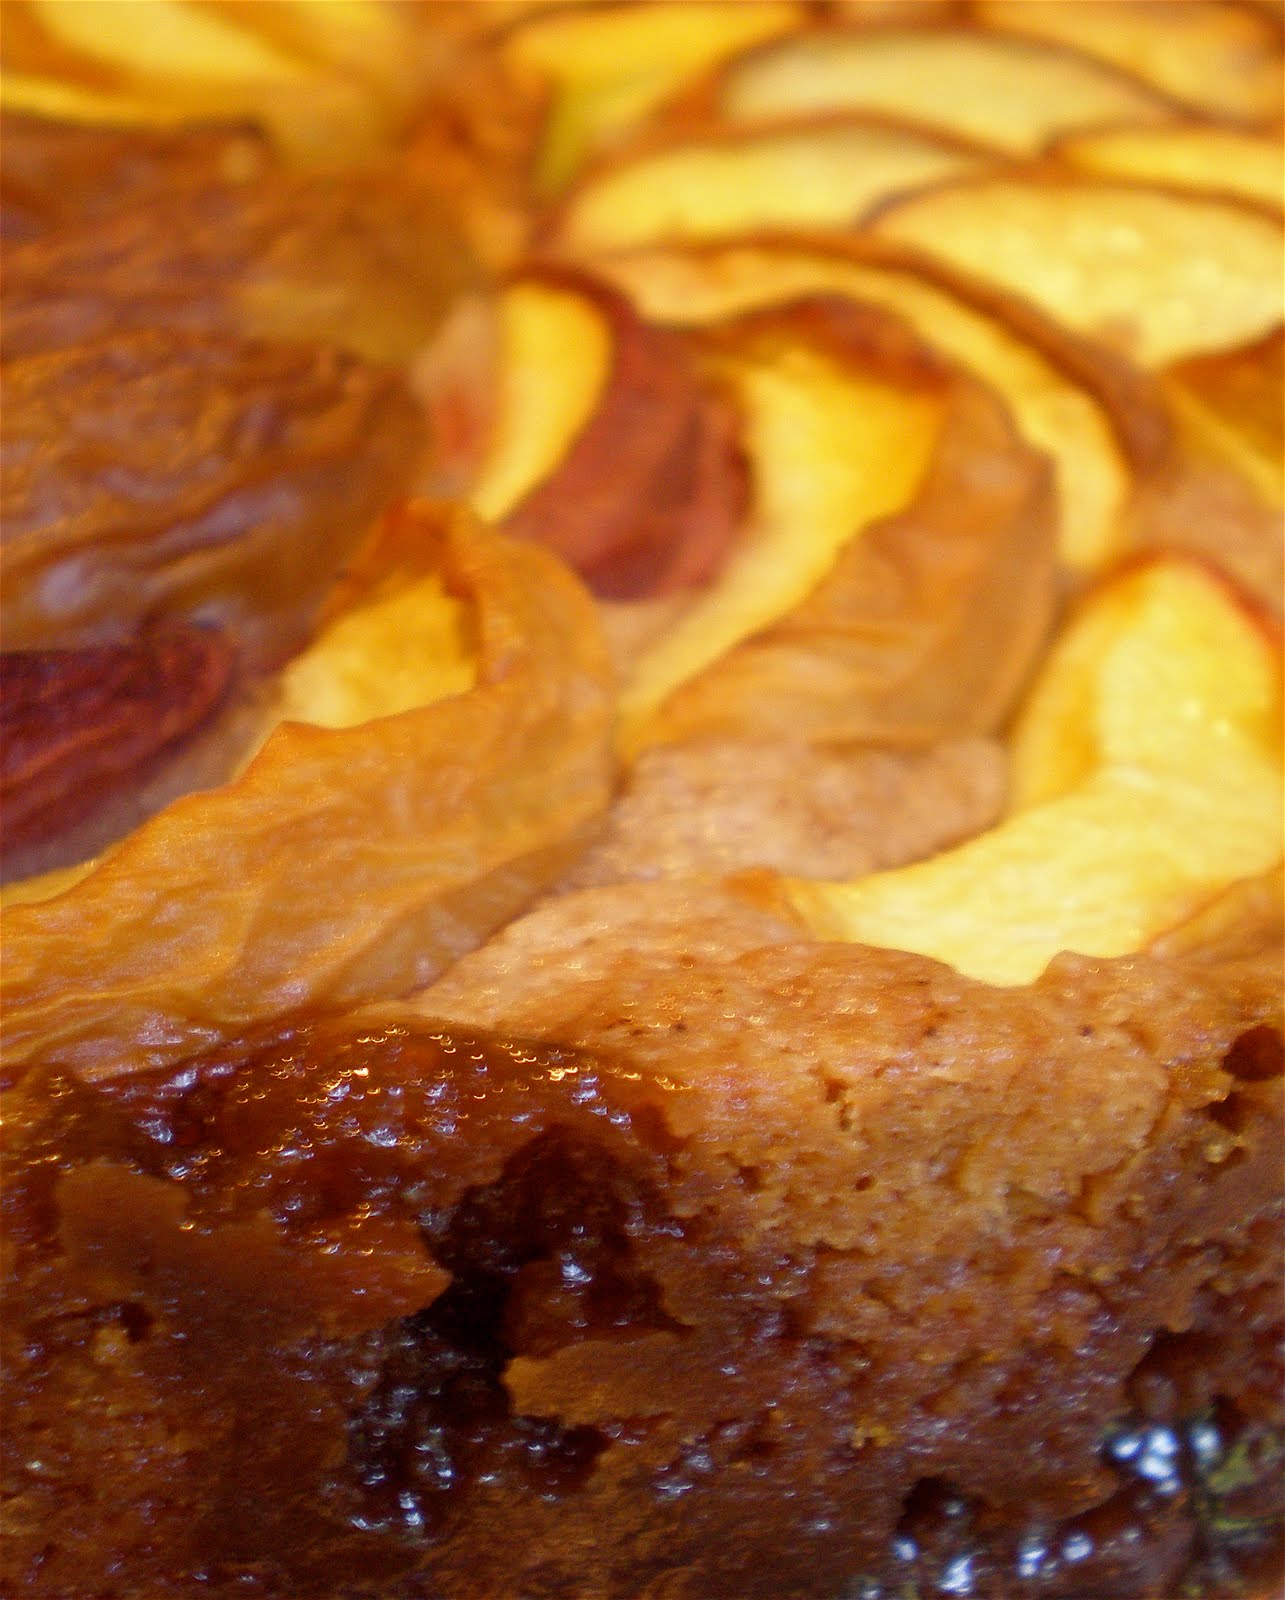
Ontario Peach and Crystallized Ginger Caramel Cake

drool.


I found a recipe for a Spicy Pear Tart and was inspired. Since we had a basket of ripe Ontario peaches in our fridge ( hiding from the fruit flies), and since I love crystallized ginger, I thought that I would do a little experimenting. It turned out gooey, spicy, sticky and sweet. In one word: Delicious.

Here is the recipe, step by step, with pictures ( yay!):

1. Preheat your oven to 300F/ 150 C. Wrap the outside of your 10 inch springform pan with 2 layers of aluminum foil ( necessary holder-in of caramel goodness). No need to grease or flour the inside.

2. In a small pot, melt together:
- 1 cup packed brown sugar
- 1/2 cup ( one stick) butter


Stir every so often, and after about 5 minutes, it should look like caramel...because that is what it will be. Hooray! If it looks like the butter isn't stirring into the melted sugar ( mmmm) then take it off the heat and stir it vigorously with a whisk or fork ( but be careful! Hot sugar = bad burns) until it is one homogeneous mixture of goodness.

Pour into your springform pan and continue on with step 3.

3. In a medium sized bowl, combine the following:
- 1 1/2 cup all purpose flour
- 1 cup white sugar
- 1 tsp baking powder
- 1 1/2 tsp ground ginger
- 2 tsp ground cinnamon
- 1/2 tsp salt


4. In another medium sized bowl, whisk together:
- 2 eggs
- 2/3 cup vegetable oil


Then stir in:
- 1 peach, chopped up into little pieces
- 1/4 cup crystallized ginger, finely diced


5. Pour your dry ingredients into your egg mixture and stir just until combined.

6. Spoon the mixture over the caramel and smooth it into an even surface using a spatula. On top, arrange attractively:
- 4 peaches, sliced

7. Bake for 1 hour and 15 minutes. Then, turn down the heat to 250 F/ 120 C and bake for another 20 minutes. When the edges are bubbling and the centre is visibly cooked, take it out of the oven. Let it cool for 5 long minutes and then present proudly, stomach grumbling, with a creme anglaise ( or to cheat, melt some vanilla ice cream) zig-zagged across the plate before placing down the slice.

Monday, June 28, 2010

Mole Poblano!


*Makes 1 L of mole -- enough for 6 servings over meat or veg. 

The following recipe will be featured in Spezzatino's chocolate issue, along with two pieces I wrote ( one about mole and the other about the history of drinking chocolate. Stay tuned).  

Here is my recipe, my concotion which is based on the abuela's tips and the ingredients she had gathered for me when I visited The Latin American Emporium in Kensington Market. 

Not all moles are made with chocolate, but mole poblano is. Here is the recipe: 
Ingredients
1 mulatto*
1 ancho*
1 guajillo*
1 pasilla*
*all of the above are whole, dried chilies. Before cooking with them, wipe them with a moist towel to remove any dust or soil.

1 red bell pepper
1 green bell pepper
4 Roma tomatoes
1 tbsp vegetable oil
½ tbsp salt

¼ cup blanched and skinned almonds, roughly chopped
¼ cup sesame seeds
¼ cup pumpkin seeds
1 generous pinch of ground cinnamon

2 tbsp vegetable oil
1 plantain, sliced into 1cm thick coins

4 cloves garlic
½ white onion

10 grams dark chocolate (I used 90% cocoa)

Instructions
1. Heat a dry skillet over medium heat. Add the 4 chilies and heat on both sides until the skin begins to blister.
2. Transfer the chilies to a medium-sizes bowl and cover with cold water. Let soak until softened, about 45 minutes.

Meanwhile…

3. Cut the peppers and tomatoes into quarters and remove the seeds. Toss them in 1tbsp vegetable oil and salt and place them skin side up on a baking tray. Bake them under a medium-hot broiler for about 20 minutes, or until tender.
4. Wipe your skillet with a dry cloth. Over medium heat, toast almonds until golden. Put into a bowl and repeat with the sesame and then pumpkin seeds. Set aside together in a bowl with the cinnamon.

5. Wipe your skillet with a dry cloth again, and add 2 tbsp oil. Over medium-high heat, add the plantain. Flip them over once the bottom is golden brown and cook on the other side for 1 minute. Put half on a plate to cool, and eat the other half immediately*.

*This recipe only needs half a fried plantain, but you might as well cook up the whole things while you’re at it. They are so delicious once fried that it makes the perfect mid-recipe snack.

6. How are your peppers and tomatoes doing? If they are done, just let them cool somewhere until you’re finished with steps 7 through 10.

7.  Using the flat side of your knife, smash the garlic and puree. (Check out Spezzatino Volume 9: Garlic, page 84 for tips.).

8. Roughly chop your white onion.

9. By now, your kitchen will be a little messy and your chilies sufficiently soaked and softened. If they aren’t soft yet, you’ve got to wait a little longer before you move onto the next step. Maybe take that time to clean up a bit? Or have some tequila to get into the Mexican mood….

10. Holding them above the bowl, one by one, remove the seeds and the stem of your chilies and place them on a cutting board once cleaned. Roughly chop them up.

11. Chop up your chocolate.

12. Add everything into your blender: peppers, tomatoes (plus any liquid on that baking tray), onion, the bowl of seeds and almonds, garlic, plantain, your chilies and the chocolate.

13. Puree until smooth.

14. Have a taste and add a bit of salt if you think it needs it. Let the layers of bitter, sweet, hot and smoky play over your tongue. Well done -- you have now made mole! Place in a jar to save for later, or heat gently and serve with turkey, chicken, pork or vegetables.

Saturday, May 1, 2010

Ricetta Facile di Focaccia*

*Easy Focaccia Recipe

The night before:

1. Mix roughly 4 cups of strong flour ( that means protein is 13-14g/100g flour), roughly equal parts water and a few flecks of instant/quick yeast.
2. Use one hand to hold the bowl, and the other to whip everything together, hand relaxed so that fingers are slightly parted. Whip until it is a sticky batter with bubbles starting to form.
3. Cover and let sit overnight*

*This is to give the flour time to absorb as much water as it can. The addition of yeast also starts a fermenting process, which makes the bread longer lasting and gives it more flavour.

The next day:
4. Add about 1 cup of flour, 7g of yeast, 1 tsp brown sugar, 1 tbsp fine sea salt and 1tbsp olive oil
5. Left hand holds bowl. Right hand mixes the ingredients together. Imagine the motion of an electric mixer ( smaller circles with your hand while your arm directs it clockwise in a bigger circle).
6. Pour VERY wet and sticky dough onto an (olive) oiled surface.
7. Fold the dough*  then place it in an oiled bowl and cover with a cloth.
8. Let rise in a warm place for 1 hour, turn* and let rise one more hour.

*For more information about folding and turning the dough,  click here

9. Prepare a baking sheet by evenly sprinkling cornmeal over the entire surface.
10. Oil your hands and work quickly  ( the dough will be very wet) to stretch the dough to the shape of the tray.
11. On the tray, stretch the dough out to the edges and then let rest 30 minutes.
12. After 30 minutes, preheat the oven to 220 C/  428 F.
13. Drizzle olive oil ontop and rub in gently with your hands.
14. If you like, sprinkle thyme, coarse salt, or anything else you fancy ( sun dried tomatoes, olives, chopped rosemary, etc)

15. When the oven has reached the temperture, bake the focaccia.
16. Check on it after about 20 minutes. Tap the top and listen for a hollow sound.
17. When it sounds hollow, place on a cooling rack and try to resist feasting until it has cooled down*


*The focaccia is still technically cooking and if, by tearing into it, you let the steam escape, you are compromising its moistness...and you wouldn't want to do that.

Friday, April 30, 2010

Escargot a la jardin

...or in English: Snails from the garden. Sounds much better in French, doesn't it?

If you won't eat snails from your garden in the name of sustainability, and if their incredible nutritional breakdown* doesn't get you excited, then you will just have to cross your fingers that the time and effort ( and butter) you put into preparing this dish will give your the courage to have a taste. Escargot is rich and tasty and if prepared properly, its soft tenderness is pleasantly surprising.

*100 grams of snail contains 16g protein, 2 grams of carbohydrates and 1 gram of fat ( high in omega-3 fatty acids). Also, from 100 grams of snail you get a whopping 19% of your  recommended daily intake (RDI) of Iron, 25% RDI of Vitamin E and 40% RDI of Selenium!

I figure, killing snails will be like killing a chicken. There is a point - between gutting the warm animal and butchering - that the chicken starts to look like food. This is going to be gut-wrenching for me as I have made serious efforts to avoid the cute slow-movers and shiver toe to head when I hear a crunch beneath my foot.

Snails take 7-10 days to get ready, so by that point, maybe I will be more keen to eat them.

Below are instructions adapted from Pat and Bob Reynolds' recipe ( one that the BBC used: here

Step 1: Collect snails (Helix Aspersa) in a container. As an appetizer, a serving is about 7 snails per person.  So let's assume you've dragged 3 friends into this endevor and collect about 30 snails.

Step 2: Cover the container VERY tightly with mesh or something that will allow the snails to breathe but not escape ( can you imagine waking up to an army of snails marching towards you in slow motion? Horrifying!

Step 3: For 7-10 days, feed the snails cabbage or lettuce. (If you want organic snails, feed them organic lettuce.) This cleans them out much the same way as feeding cornmeal water to shellfish*. Good, edible stuff goes in and sandy, gritty stuff comes out.

*Did you know snails are terrestrial mollusks? 

Step 4:  Plop your friends into a sieve and then dunk them in boiling water. This is to kill them, not cook them, so only keep them in the water for a few seconds.

Step 5: Use a fork to pull the snail from its shell. Keep the shells in one bowl ( they are nice for presentation purposes) and the snails in another. Give the snails a rinse under lukewarm, running water.

Step 6: In a pot, combine:
160ml water
100ml dry cider,
One small carrot, roughly chopped
One small white onion, roughly chopped
The snails*

*Make sure they are covered with liquid. Add a bit more water if they are not.

Step 7: Bring to a boil and then turn the heat way down and let them simmer for about 40 minutes.
       
Meanwhile: Boil the shells in salted water, rinse in cold water and repeat two more times. Put the shells on a tray and dry them in a warm oven.

Step 8: Nothing like a bit of butter to take away your worries.

In a small bowl, mix together the following:
1/4 lbs salted butter, room temperature.
½ tsp fresh Chervil, chopped finely
½ tsp fresh Dill, chopped finely
½ tsp fresh Basil, chopped finely
½ tsp fresh Sage, chopped finely
3 teaspoons fresh Parsley*, chopped finely
Pinch of Cayenne Pepper

*Curly parsley is easier to cut, but often sandier. Flat leaf parsley has more flavour. 

While you're chopping herbs, finely chop some chives, and save some parsley, which you can use as garnish.

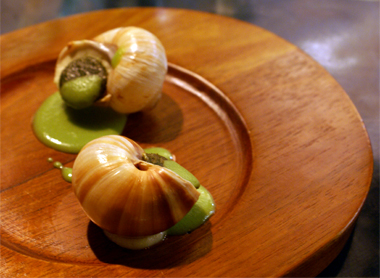
Step 9: I bet you're starting to get hungry. You may even be talking to your snails now, threatening them that they better be delicious after all this hard work and time you've put in. Push a little of the butter mixture into the shell, right to the back. Put in the snail and then seal him in there with more delicious herby butter. You can do this ahead of time, and keep them in the fridge after assembled, or you can cook them right away.

Step 10: To serve, place the escargot de la jardin on escargot trays ( or on a baking sheet if you don't have one) and into a hot hot oven. When the butter bubbles, they are ready. Serve with crusty bread.

The photo above was taken by Mellie at five star restaurant, Vue de Monde

Monday, March 29, 2010

Hemp and Whole Wheat Bread with Sunflower Seeds and Currants


Mix together:
400g wholemeal flour
100g white bread flour
30g hemp flour
7g yeast
400ml warm water


Wait 10 minutes

Add, roughly:
1/2 cup sunflower seeds
1/4 cup currants
1tbsp fresh thyme
1/2 tbsp salt
1 tsp cane sugar


Mix to combine and wait 10 minutes

Form into a ball and put into an oiled bowl, covered with a tea towel, for 45 minutes in a warm spot


Set your oven to 220 C/ 428 F

Turn the dough like in the pictures below


Fold the dough over and seal the seam underneath


Let rise 15 minutes on a tray with cornmeal


 After about 20 minutes, score the bread


 Once oven has reached 220 C/ 428 F, put the bread in the oven, on the centre rack.

After 10 minutes, turn the oven down to 200 C/ 392 F and bake for 30 more minutes, or until bread sounds hollow when the underside is tapped


Let cool completely before slicing