Showing posts with label grow your own. Show all posts

Wednesday, July 20, 2011

Learn to Grow Food in Small Spaces


This wonderful, FREE event will teach you how to grow your very own food on your balcony, rooftop or backyard - no matter how small!

Check it out on Saturday, August 13th from 2-5pm at Eastminster United Church, 310 Danforth Ave, Lower Level


Thursday, December 30, 2010

Seasonal Food Guide Tea Towel


Only one year old, Stuart Gardiner Design products can be found all over the UK.  To stay as green as possible, all textiles and prints are produced in East London. And, as most things coming out of East London these days, they are pretty hip. Their t-shirts are cheeky and a bit bizarre - something you'd expect to see at Magic Pony - and so are some of their tea towels. I especially enjoy the Teat Owl Tea Towel  and the Gentleman's Handshake. 

But a little more serious now. Stuart Gardiner Design also produces a variety of seasonal guides on mugs, aprons and tea towels. You can choose between a seasonal and sustainable guide to British fruits and vegetables; Seafood; Garden flowers; and Wild foods. All production is UK-based, and all cottons are organic in order to keep environmental impact to a minimum. The towels are only £10, and the seasons are fairly similar, so you can still use the tea towel in Canada as a rough guide. (Plus it's a really nice tea towel and you would be supporting the company's green intentions.)

Now we just need someone to make us a Canadian guide to seasonal things, produce it here, and stick it on a tea towel. Perhaps the folks over at Kid Icarus might be interested...

Sunday, August 8, 2010

Green in the GTA

Here is a fantastic site to keep updated with all the green events going on in the Greater Toronto Area.

Click here: http://greengta.ca/

Saturday, June 5, 2010

Grow Some Beans


Beans may not always have the best reputation, but they really are something to honor. They are little fighters -- producing pod after pod of nutritious beans from now until the fall. Think of how proud you would be to serve a bean salad made entirely from beans you harvested! And when you have had enough of beans -- because every morning you will have more pods ready to pick -- then you can shell the pods and lay the beans on a tray to dry in the sun. Once dry, pour them into some jars.

Come winter your pantry will be fully stocked and ready for all your winter comfort foods. You may not be craving a bubbling hot cassoulet now, but when you do, you'll be prepared.

How to Grow Your Own Beans
Beans are wonderful because just one plant can produce so many pods. This means if you live in an apartment, you can grow your beans on your porch, or by a window.  Direct plant them. Beans don't like to be transplanted, so where you plant them it where they shall stay. Sow the seeds this week and in about 75 days you will have bean plants with pods beginning to appear in plenty.  Let pods dry on the plant -- they should feel papery and come off the branch easily. Shell them and lay the beans on a tray in the sun to dry out. Once dry, after a day in the sun, jar them.

It's time to grow some beans!


Click here for more information about beans
Click here for more information about how to plant them.


How to Cook Your Own Beans
The night before you are planning to eat your beans, put 1 part beans to 5 parts cold water in a large container. One cup of dried beans yields about 3 cups cooked. NEVER add salt at this time; Salt does something funny to beans and stops them from absorbing water ( it's an osmosis thing). Leave your beans overnight. The next morning, drain and rinse your beans. Add beans to a pot with water (same ratio of as before). Once the water comes to a boil, turn down the heat and simmer for 20 minutes. Ok, *now* you can add your flavours ( bay leaf, salt, peppercorns, carrots, celery, or whatever you feel like). Continue simmering for about another 40 minutes. When the beans are tender, they are ready. Drain but don't rinse. Even if you are making a cold bean dish, add the dressing when the beans are still warm. They will soak up the dressing and be super delicious. If you need them to cook down fast, lay them on a cling film-lined baking tray. 


Other Benefits of Growing Your Own Beans: 
- Canned beans are cheap, but not as cheap as dried beans!
- Canned beans have tons of salt
- Canned beans require cans, therby creating more waste
- Canned beans are heavy, and so transporting them uses a large amount of pollution
...and most importantly:

- You get to be close to your food: See it grow and appreciate it that much more

 Photo of Trionfo Violetto beans by S. Irene Virbila

Sunday, May 23, 2010

Gardening in May/June

On a beautiful sunny afternoon in late May or early June, do some gardening.

Beans - Plant seeds 1 1/2 - 2" deep in soil. Harvest in 60 days.

Beets - Plant seeds 1/2" deep in soil. Harvest in 40-70 days.

Cucumbers - Plant seesd 1" deep. Cucumbers will creep over your garden, so don't plant anything else within 3 feet. Harvest in 2-3 months.

Peppers - Set the small plants (without fruit or flowers!) in warm soil 1/2" deep. If the soil is too high in nitrogen, then you will end up with lots of plant and few peppers. Don't plant them next to other nightshades ( tomatoes, eggplant, etc), as they can all contract the same diseases. Harvest in 4 months.

Pumpkin - They grow and grow and crawl over everything, so plant them in an area where they have room to spread. Plant the seeds 3-4" deep and harvest in 4-5 months.

Tomato plants - Get those tomato plants in now, as in this week! Plant them deep in the soil. One nifty trick is to plant them close to marigolds, which will keep the aphids away. 

Friday, April 30, 2010

Escargot a la jardin

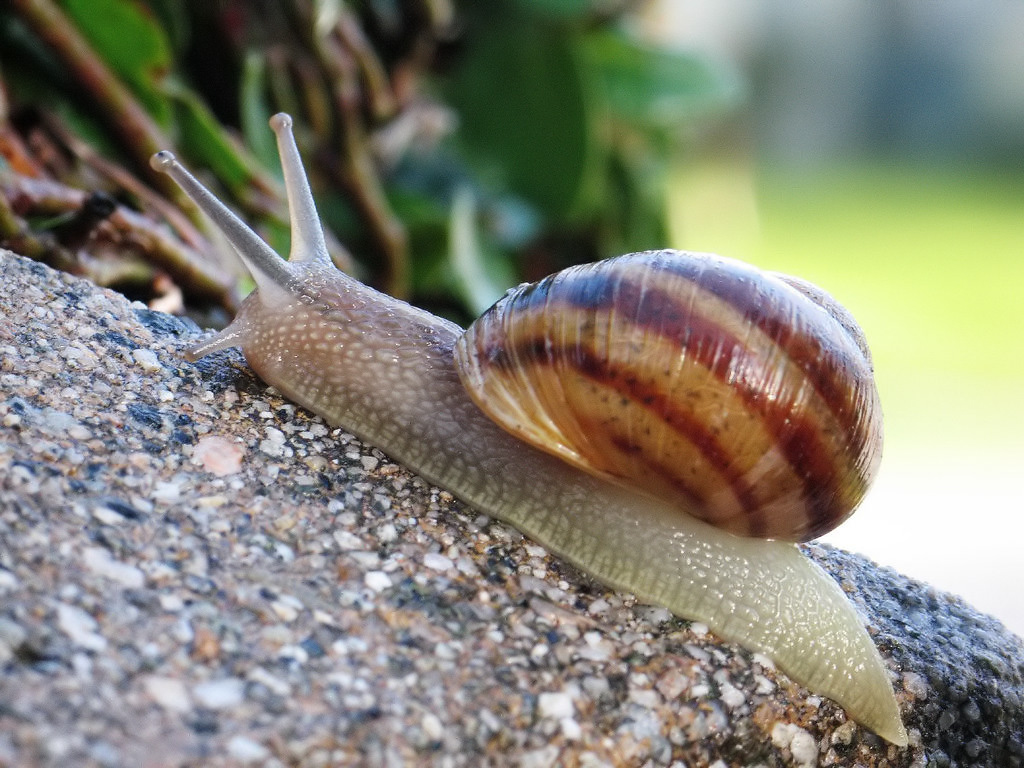
...or in English: Snails from the garden. Sounds much better in French, doesn't it?

If you won't eat snails from your garden in the name of sustainability, and if their incredible nutritional breakdown* doesn't get you excited, then you will just have to cross your fingers that the time and effort ( and butter) you put into preparing this dish will give your the courage to have a taste. Escargot is rich and tasty and if prepared properly, its soft tenderness is pleasantly surprising.

*100 grams of snail contains 16g protein, 2 grams of carbohydrates and 1 gram of fat ( high in omega-3 fatty acids). Also, from 100 grams of snail you get a whopping 19% of your  recommended daily intake (RDI) of Iron, 25% RDI of Vitamin E and 40% RDI of Selenium!

I figure, killing snails will be like killing a chicken. There is a point - between gutting the warm animal and butchering - that the chicken starts to look like food. This is going to be gut-wrenching for me as I have made serious efforts to avoid the cute slow-movers and shiver toe to head when I hear a crunch beneath my foot.

Snails take 7-10 days to get ready, so by that point, maybe I will be more keen to eat them.

Below are instructions adapted from Pat and Bob Reynolds' recipe ( one that the BBC used: here

Step 1: Collect snails (Helix Aspersa) in a container. As an appetizer, a serving is about 7 snails per person.  So let's assume you've dragged 3 friends into this endevor and collect about 30 snails.

Step 2: Cover the container VERY tightly with mesh or something that will allow the snails to breathe but not escape ( can you imagine waking up to an army of snails marching towards you in slow motion? Horrifying!

Step 3: For 7-10 days, feed the snails cabbage or lettuce. (If you want organic snails, feed them organic lettuce.) This cleans them out much the same way as feeding cornmeal water to shellfish*. Good, edible stuff goes in and sandy, gritty stuff comes out.

*Did you know snails are terrestrial mollusks? 

Step 4:  Plop your friends into a sieve and then dunk them in boiling water. This is to kill them, not cook them, so only keep them in the water for a few seconds.

Step 5: Use a fork to pull the snail from its shell. Keep the shells in one bowl ( they are nice for presentation purposes) and the snails in another. Give the snails a rinse under lukewarm, running water.

Step 6: In a pot, combine:
160ml water
100ml dry cider,
One small carrot, roughly chopped
One small white onion, roughly chopped
The snails*

*Make sure they are covered with liquid. Add a bit more water if they are not.

Step 7: Bring to a boil and then turn the heat way down and let them simmer for about 40 minutes.
       
Meanwhile: Boil the shells in salted water, rinse in cold water and repeat two more times. Put the shells on a tray and dry them in a warm oven.

Step 8: Nothing like a bit of butter to take away your worries.

In a small bowl, mix together the following:
1/4 lbs salted butter, room temperature.
½ tsp fresh Chervil, chopped finely
½ tsp fresh Dill, chopped finely
½ tsp fresh Basil, chopped finely
½ tsp fresh Sage, chopped finely
3 teaspoons fresh Parsley*, chopped finely
Pinch of Cayenne Pepper

*Curly parsley is easier to cut, but often sandier. Flat leaf parsley has more flavour. 

While you're chopping herbs, finely chop some chives, and save some parsley, which you can use as garnish.

Step 9: I bet you're starting to get hungry. You may even be talking to your snails now, threatening them that they better be delicious after all this hard work and time you've put in. Push a little of the butter mixture into the shell, right to the back. Put in the snail and then seal him in there with more delicious herby butter. You can do this ahead of time, and keep them in the fridge after assembled, or you can cook them right away.

Step 10: To serve, place the escargot de la jardin on escargot trays ( or on a baking sheet if you don't have one) and into a hot hot oven. When the butter bubbles, they are ready. Serve with crusty bread.

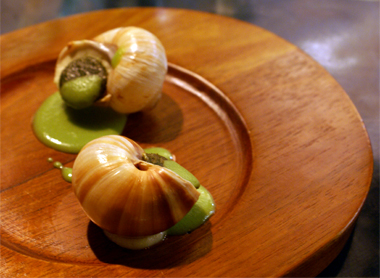
The photo above was taken by Mellie at five star restaurant, Vue de Monde

Friday, February 5, 2010

Plant a Nut Tree to Save The Planet

photo by William Gray Harris

Well, maybe not to save the planet, but it definitely helps. Totnes is overflowing with vegetarians and my guess is because the  people who live in and around Totnes are all very connected with their surroundings. Most buy groceries from Riverford, a farm just a 30 minute bike ride away. A recent report entitled "Can Britian Feed Itself"  on the Transition Towns website discusses that there is simply not enough land for every town to feed itself. The land required to raise cattle and sheep - delicious as they are - retracts from the ability for a town to grown enough food to eat locally.

Eating locally is now considered superior to organic for a number of reasons: local food may also be organic but may not have the expenses to pay for the designation and local food is not shipped to you by polluting trucks ( lorries) and planes. Does it not seem backwards that someone would pay for organic olive oil from Italy, and have the heavy glass bottle flown to one location and then trucked to another just to avoid pesticides? Eating locally is delicious, nutritious and sustainable - as long as everyone eats a variety and in moderation.

Tomorrow I will be volunteering in Bridgetown with a group of locals and together we are going to spend the day planting nut trees in green spaces around the town. We will also get a demonstration of how to prune the trees that were planted last year. Hopefully it doesn't rain.

We will be planting nut trees so that there is a  sustainable protein source in the future.  Walnut trees can take up to 20 years to bare fruit if they are not properly pruned in the summer, but it is reassuring to think that the Totnes population is thinking that far ahead.

100 grams of walnuts provides 24 grams of protein, 59g of fat (91% of your daily recommended allowance) and 10 grams of carbohydrates ( 7 grams of which are fibre). For complete protein they should be eaten with tofu or eggs.

Neither Britain nor Canada will be able to provide enough locally grown food for the population if everyone continues to eat so much. I am not promoting vegetarianism as the only way to live - I was a vegetarian for 13 years but I love meat too much to give it up now - but be aware of how much meat you eat and how often. The Canadian Food Guide recommends women and men aged 19-50 years old consume 2 and 3 servings respectively of meat and/or alternatives per day.

Examples of ONE SERVING:
  • - 2 tbsp/ 30ml of peanut butter ( real peanut butter, not Skippy)
  • - 2 eggs
  • -3/4 cup/175 ml cooked lentils
  • -75 g (2 ½ oz) / 1/2 cup cooked chicken or cooked beef or cooked fish/shellfish

Monday, February 1, 2010

Tan Your Hide With Brains

Yesterday I learned the most fascinating thing: Each animal's brain contains exactly the right amount of lethicin required to tan its own hide. Frequently hunted animals - all with the perfect ratio of brain to hide - include deer, raccoons, beavers and rabbits. It is as if they are asking to have every part used! And we should listen.

Tanning is the process whereby rawhide is soaked in a brainy solution, which strengthens it and changes it to leather. If this process is not completed, the rawhide will quickly begin to decompose and will be useless.

I know that fur and hide are not food, but it is all connected. I recently discussed in my article about offal, that it is important (and possible!) to use every part of the animal.

I especially hope this information reaches all the chefs who like to forage and hunt for their food but who may be too excited about the gamey interior to take the time to do something with the hide. If you have time to sit in the forest, perhaps keeping warm with a little hot toddy, why not enjoy nature a little longer by taking care of that hide once the animal has been skinned.

After skinning the animal, the hide requires a process called wet-scraping. It is then cleaned, then soaked in the brain solution, and then stretched to dry. All instructions can be found if you click here.

Do not get depressed thinking about the leather industry’s chemical run-off; Instead, get excited about the opportunity to naturally tan your very own hide with zero pollution. What chef wouldn’t want to wear a leather jacket custom made from a the same animal that was also braised in red wine and juniper berries or perhaps aged and devoured with a silky blueberry demi-glaze.

For more information, check out: THE ULTIMATE GUIDE TO SKINNING AND TANNING: A Complete Guide to Working with Pelts, Fur, and Leather by Monte Burch

Or take a look at the Two Wolves website

*I am in NO way promoting hunting for sport. I despise the idea of killing for fun. The instructions I am providing are for those who kill responsibly and in a sustainable manner, meaning no part of the animal is wasted and the animal is not shot in an area where it is illegal, nor is the animal endangered.